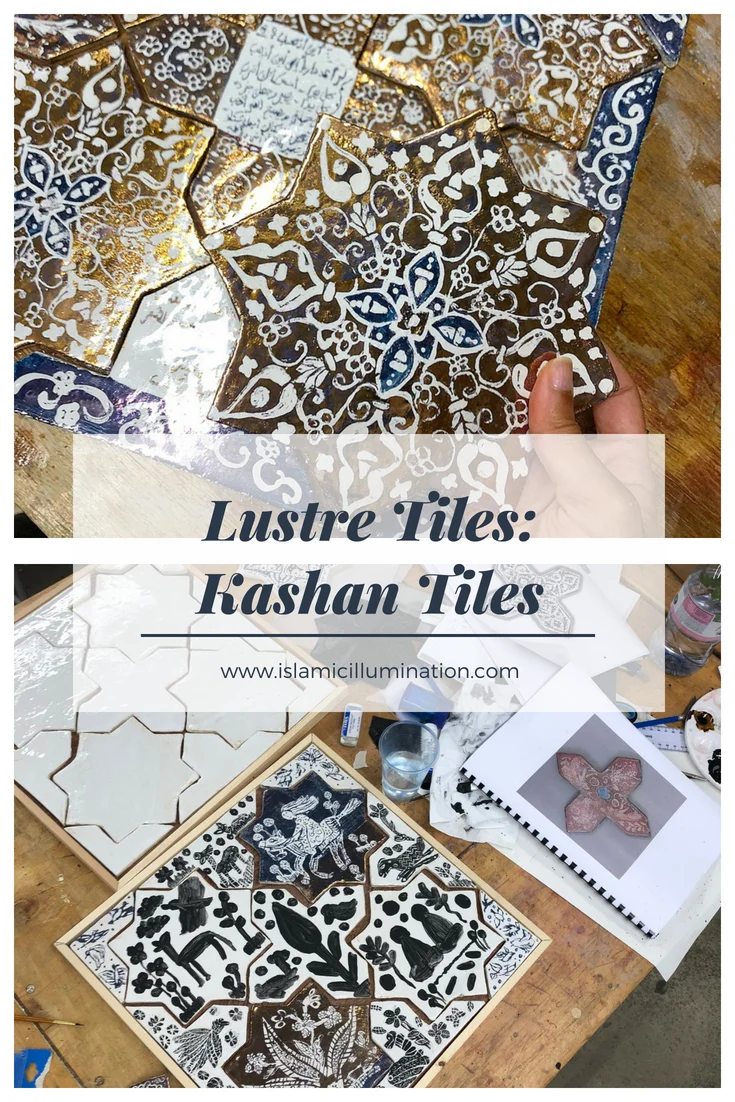
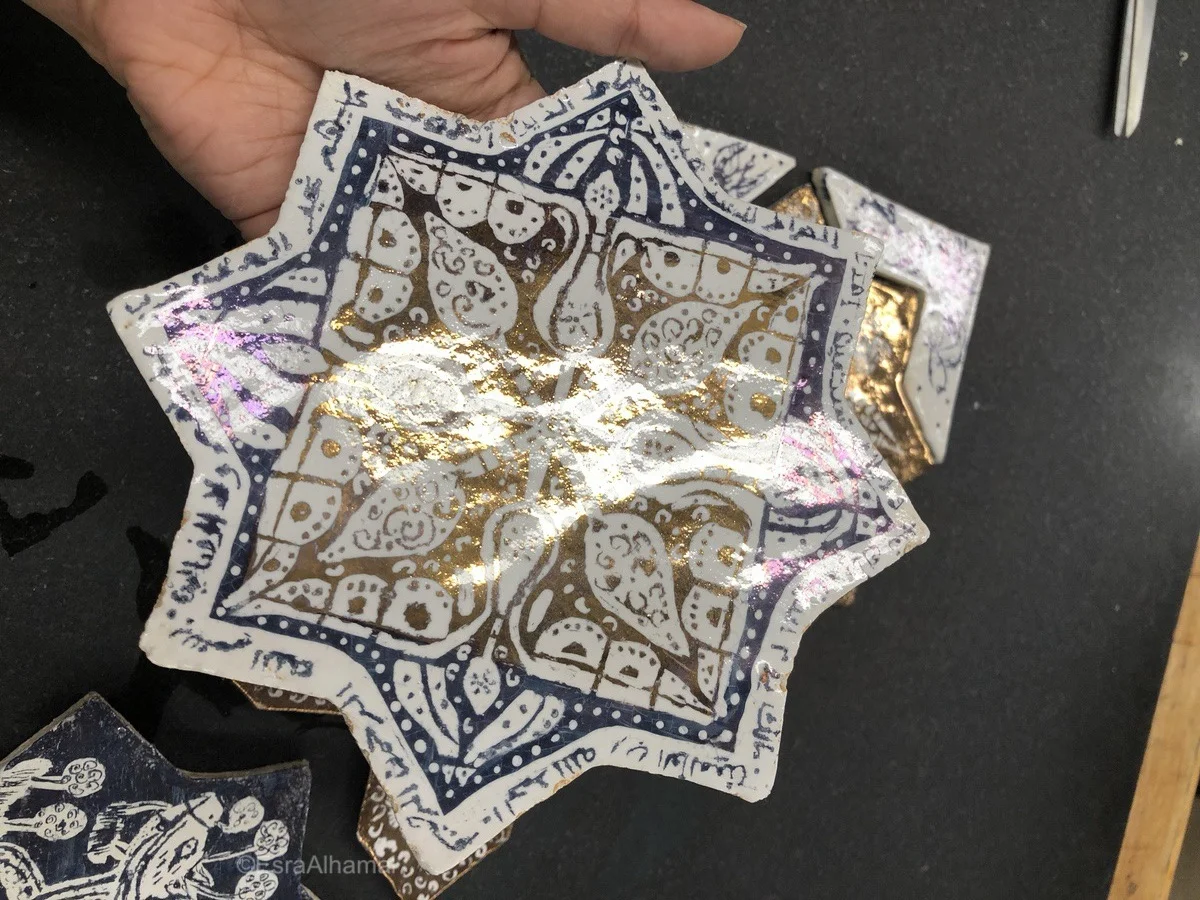
Lustre Tiles: Kashan Tiles
After learning about designing and glazing tiles and having a go at pottery, I felt like the only thing that I was missing was the knowledge of adding gold into tiles and you know how much I appreciate the reflection of light on a golden surface. This affect is achieved by something called lustre. So, when I found a class teaching the lustre technique at the Prince’s School or Traditional Arts in London, I had to go for it. It was taught by Boris Aldridge, who is a practicing lustre tile maker. I have been admiring his work on Instagram for months, so the fact he was giving the class got me really excited to enrol.
What does Lustre mean?
Lustre means a shiny affect applied on the surface of ceramics.
The special thing about lustre is the temperature that the ceramic tiles are being fired at (7020 degrees) because it is much lower than the usual firing. Lustre cannot be applied on bisque tiles/objects directly. It can only be applied to glazed tiles that have been fired twice before the lustre is applied.
How do you make lustre tiles?
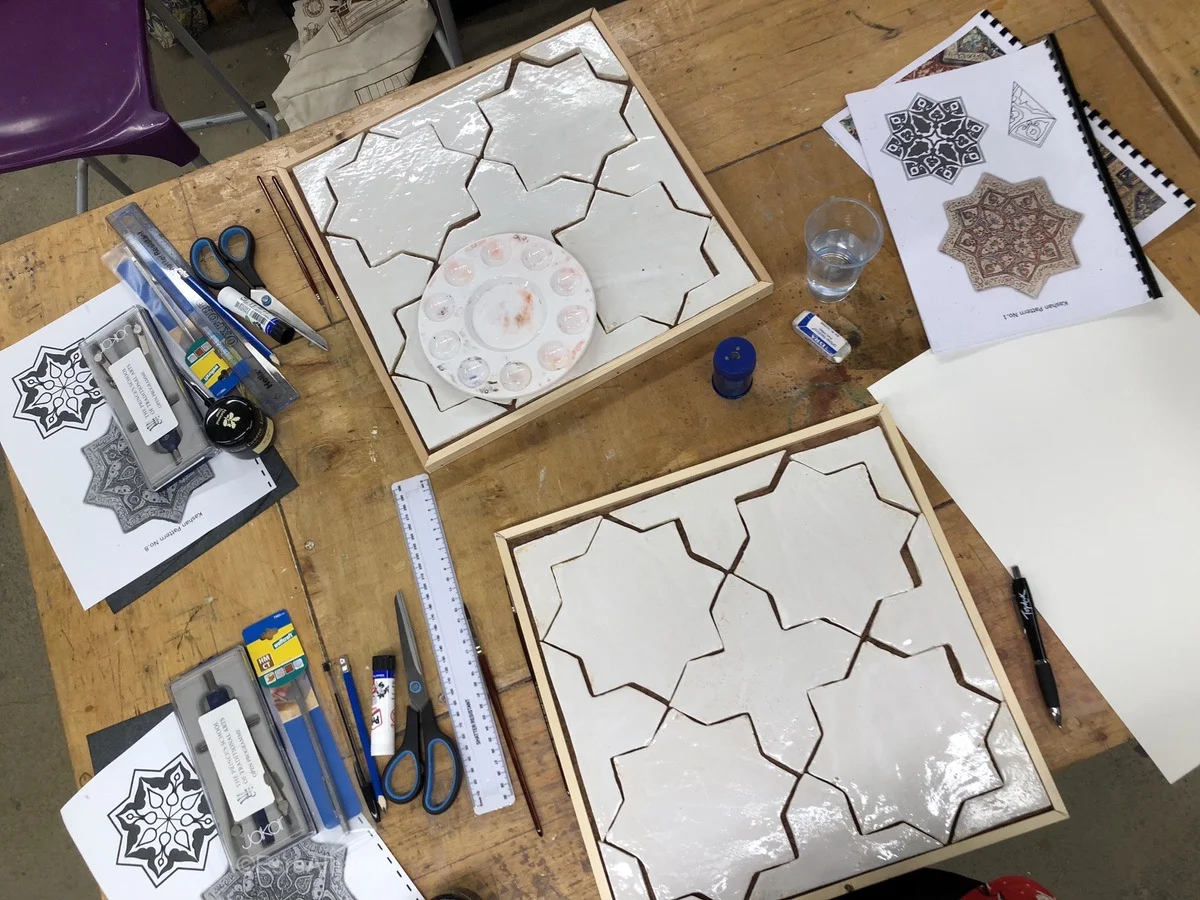
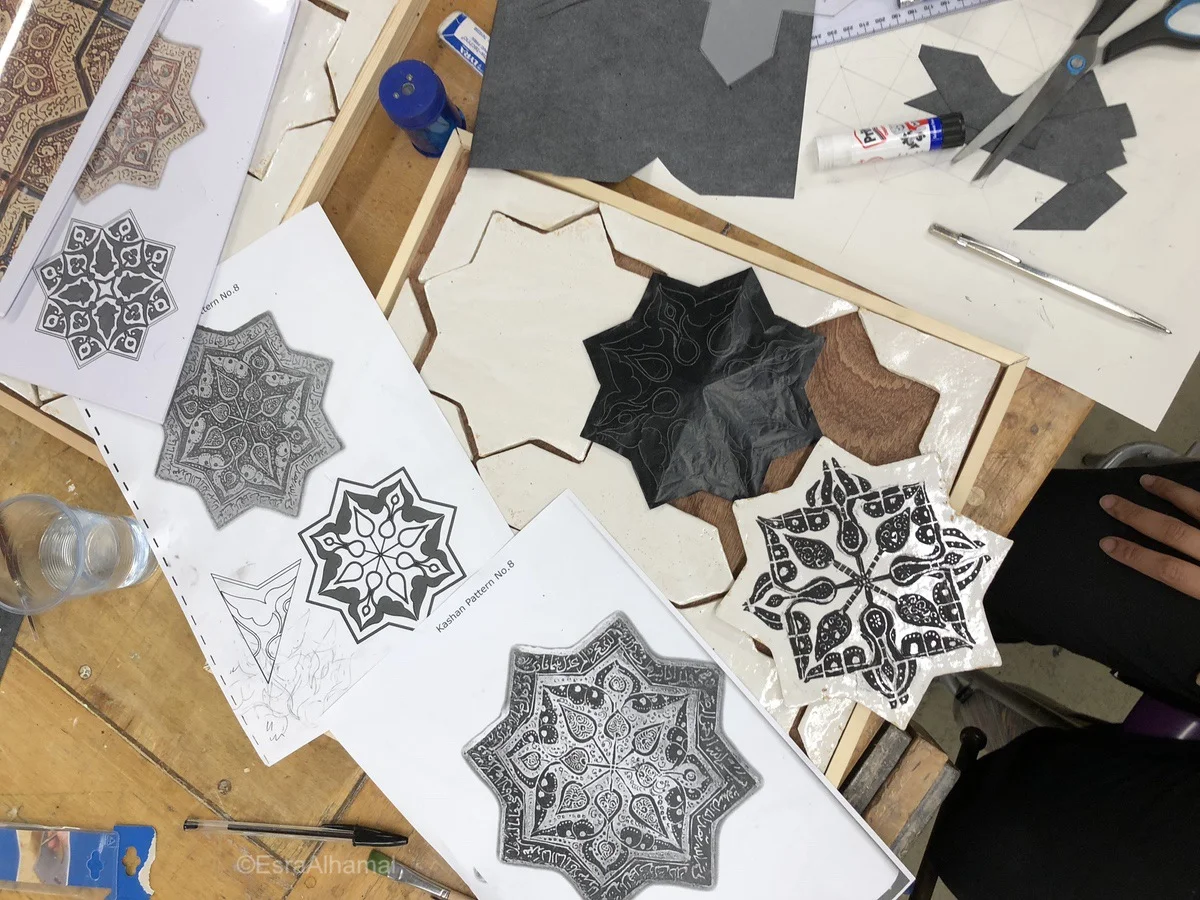
Determine the shape of the tiles
A lot of the Kashan tiles specifically are made of an eight pointed star and a cross arrangement known as the “breath of the compassionate” a name given Keith Critchlow. Your design will change based on the shape of the tiles, so it is good to make the decision before starting.
Choose a design
You can use a tile template from old architecture or be inspired from them. In the Kashan tiles, they used mythical creatures and natural biomorphic designs along with some Quranic verses and poetry.
Transfer the design
To transfer the design there are two ways: You can either draw the design under a carbon paper layer and a pen then paint those transferred line with black acrylic paint. The second method is to start with the acrylic paint on the tile directly with a hand free design.
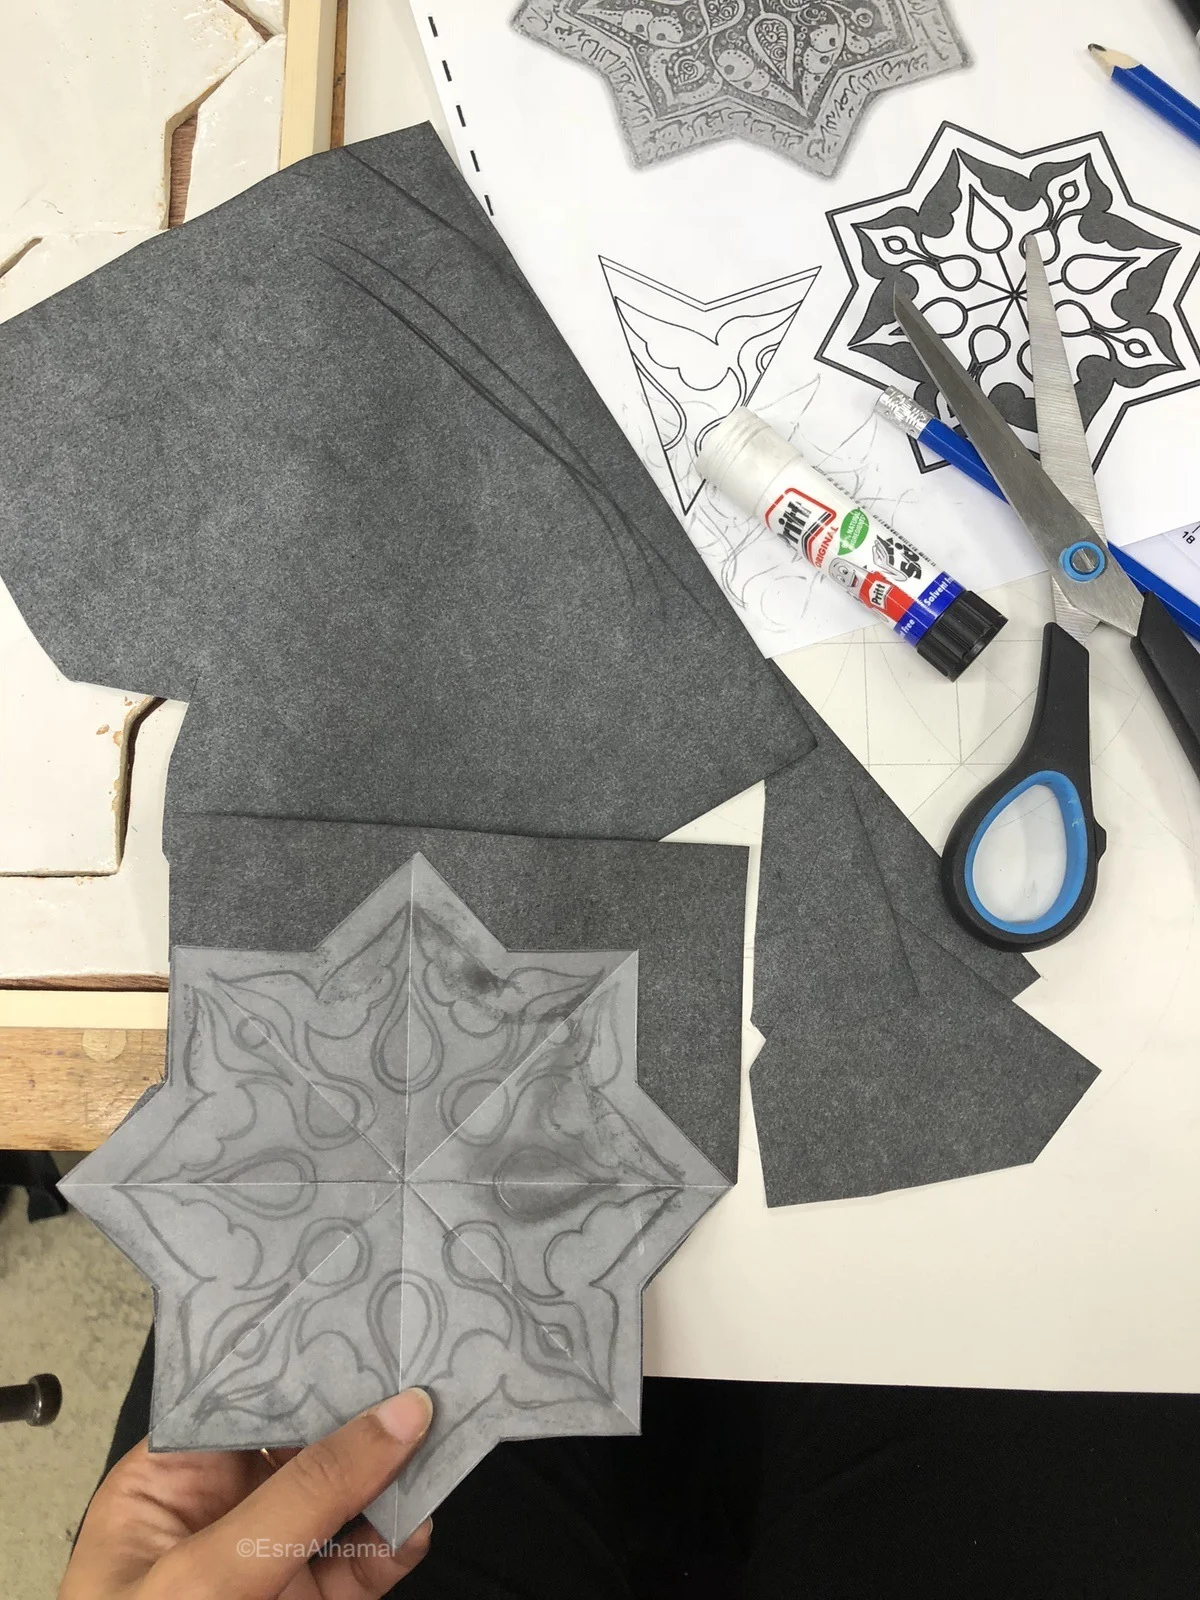
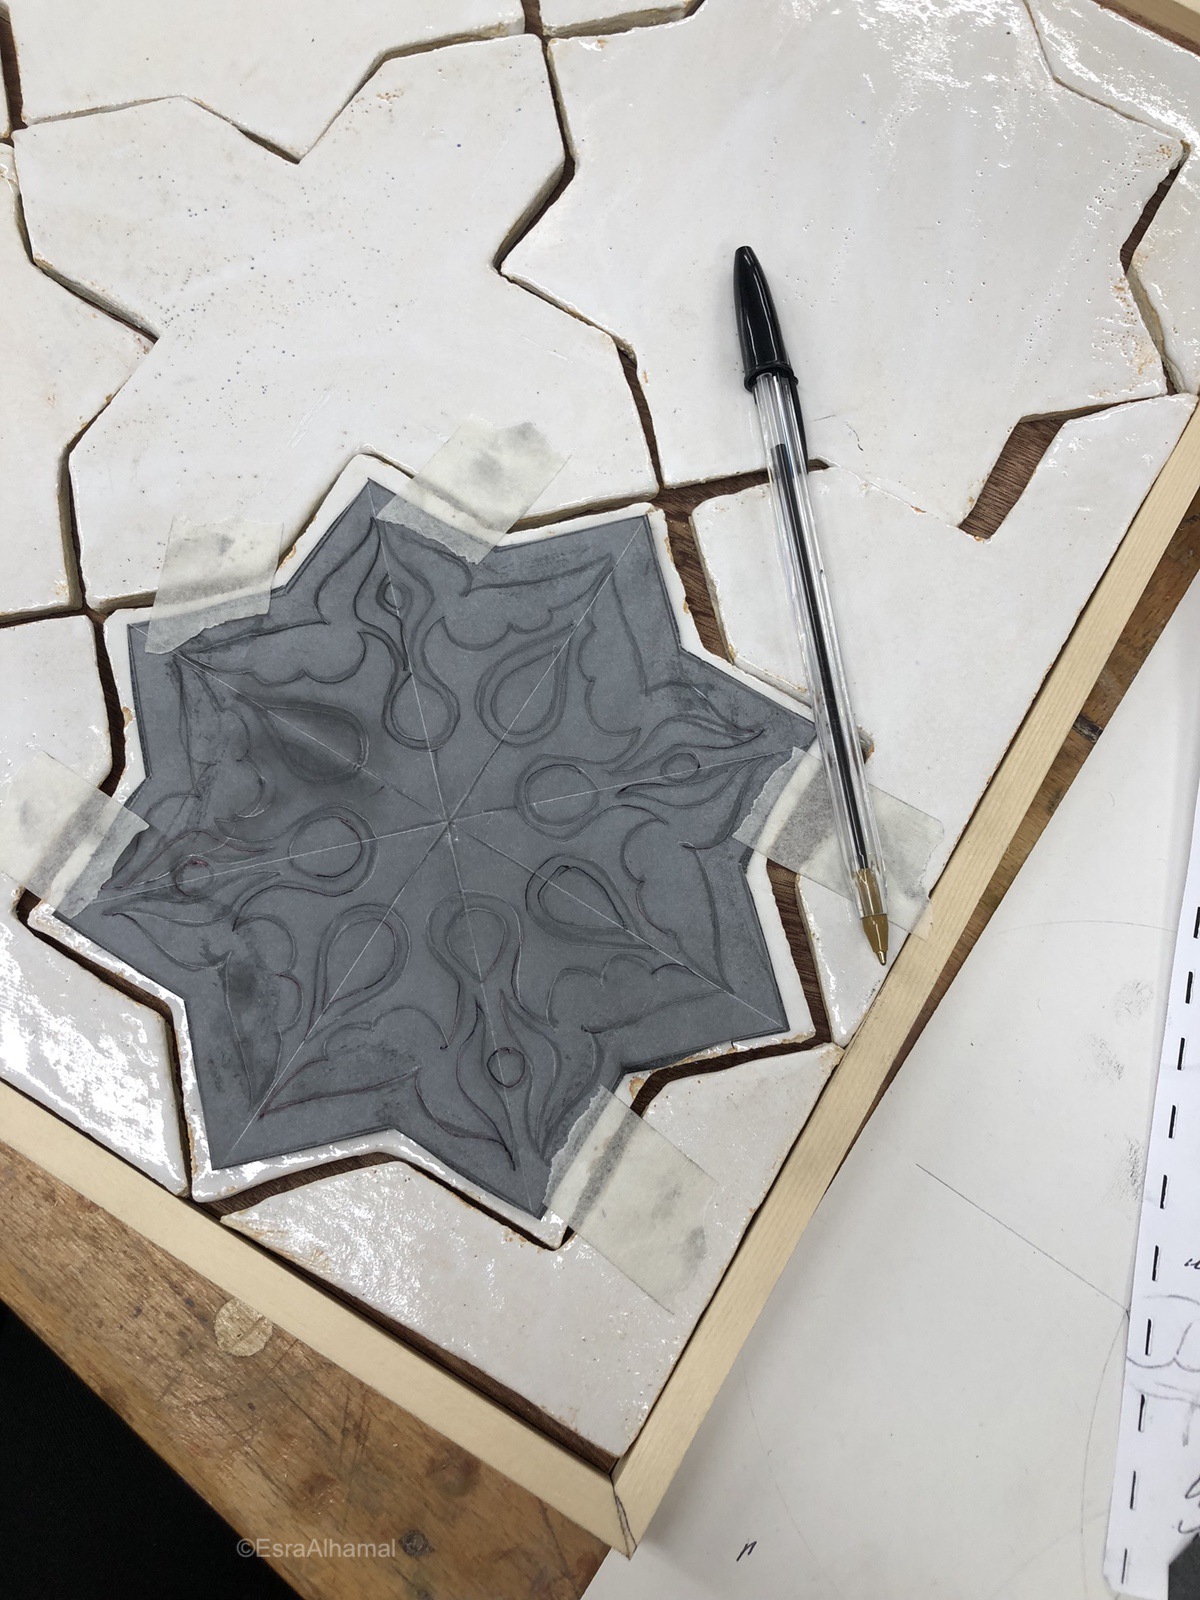
Carve the design
In this stage you are working with the negative space, which means that the result will be the opposite of what your eye can see. Whatever method you followed to transfer, you need to clean your design or lines by using a scribe.
Apply the lustre
The lustre comes in a little brown bottle and all you need is a very little amount for every tile. Apply it carefully with a brush and all you need is a very thin layer otherwise it burns. All lustres look like sticky yellow paint and they dry quickly. Please take caution when applying and read all the lustre labels. The lustre application is going to be on everything (the black and the white space). Basically all the white spaces that you left in the design will become shiny with lustre and all the black will burn off and become white space.
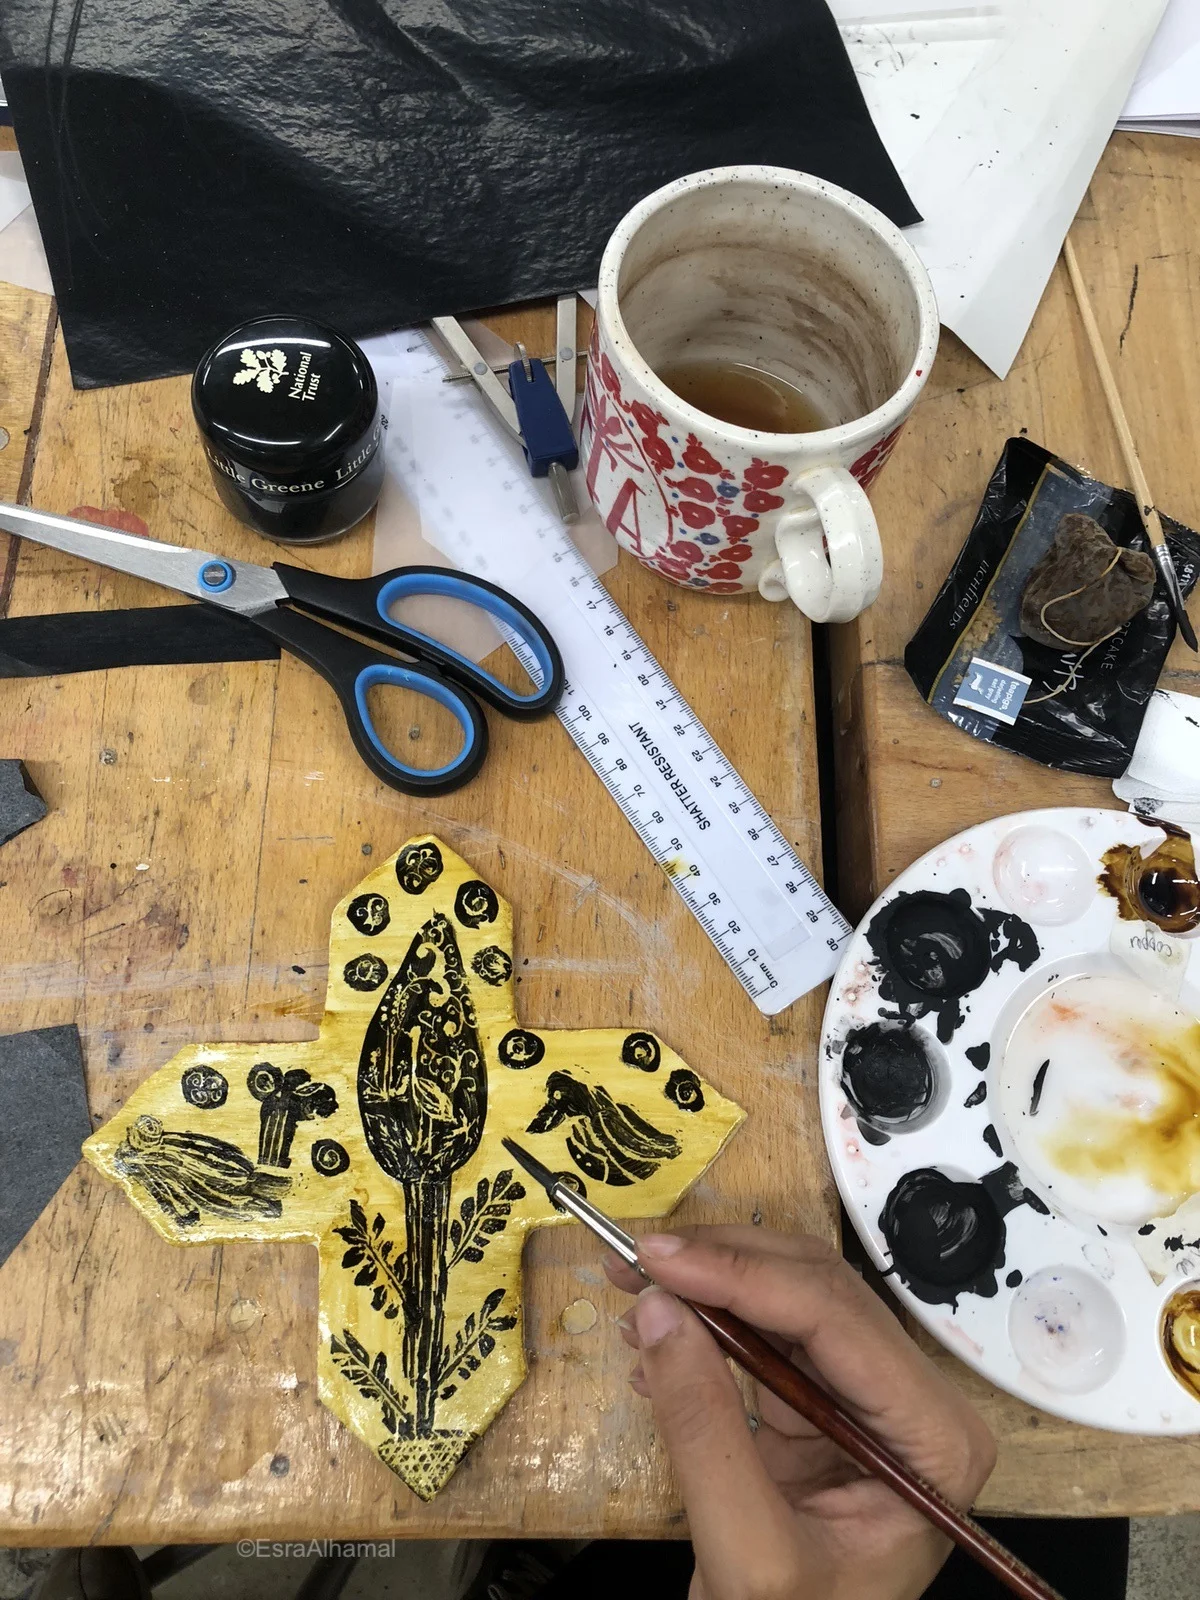
That yellow colour you see is the lustre
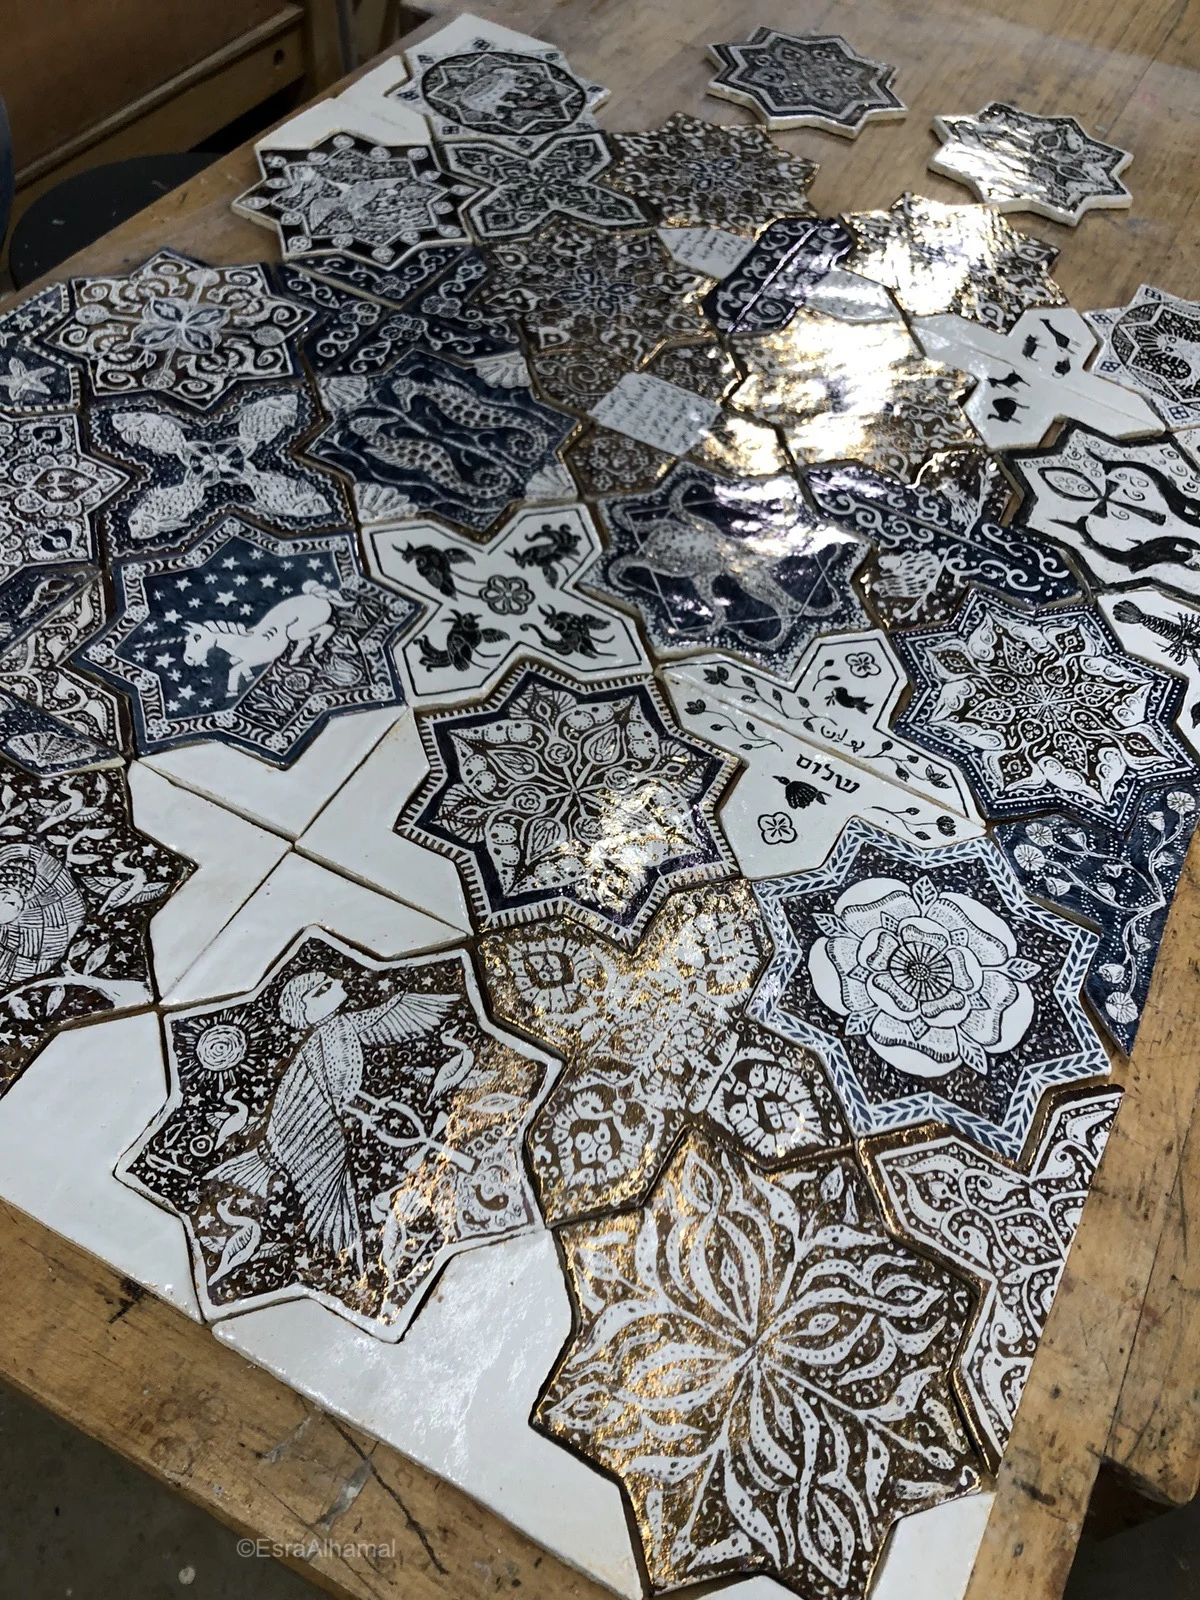
Fire the tiles
When the tiles are done then they are ready to be placed in the kiln and fired over night. The temperature we used was in the 700 degrees, which is much lower than usual firing temperatures.
Ps. If you are using a community kiln, make sure you double check on their requirements because sometimes you are not allowed to fire lustre painted tiles on there.
What materials and supplies would you need for making your own lustre tiles?
Pencil
Transfer paper
Carbon sheets
Pen
Brushes
Colour palette
Black acrylic paint
Scribe
Lustre ( this is the most expensive component. For gold lustre it’s about £40 for 5 grams, which comes in a mini glass bottle. It is also flammable and releases fumes once in the kiln, so use complete caution when working with them)


How long does it take to make a lustre tile?
It really depends on how fast you work, how much details you are adding and how you understand negative-space. It can take from half an hour to three hours. You will have to do a few tests to see what your speed is like. For the free hand creature designs, it took me about half an hour each, but they are very rough and quick. The detailed patterned tiles took me between an hour and a half to two hours each.
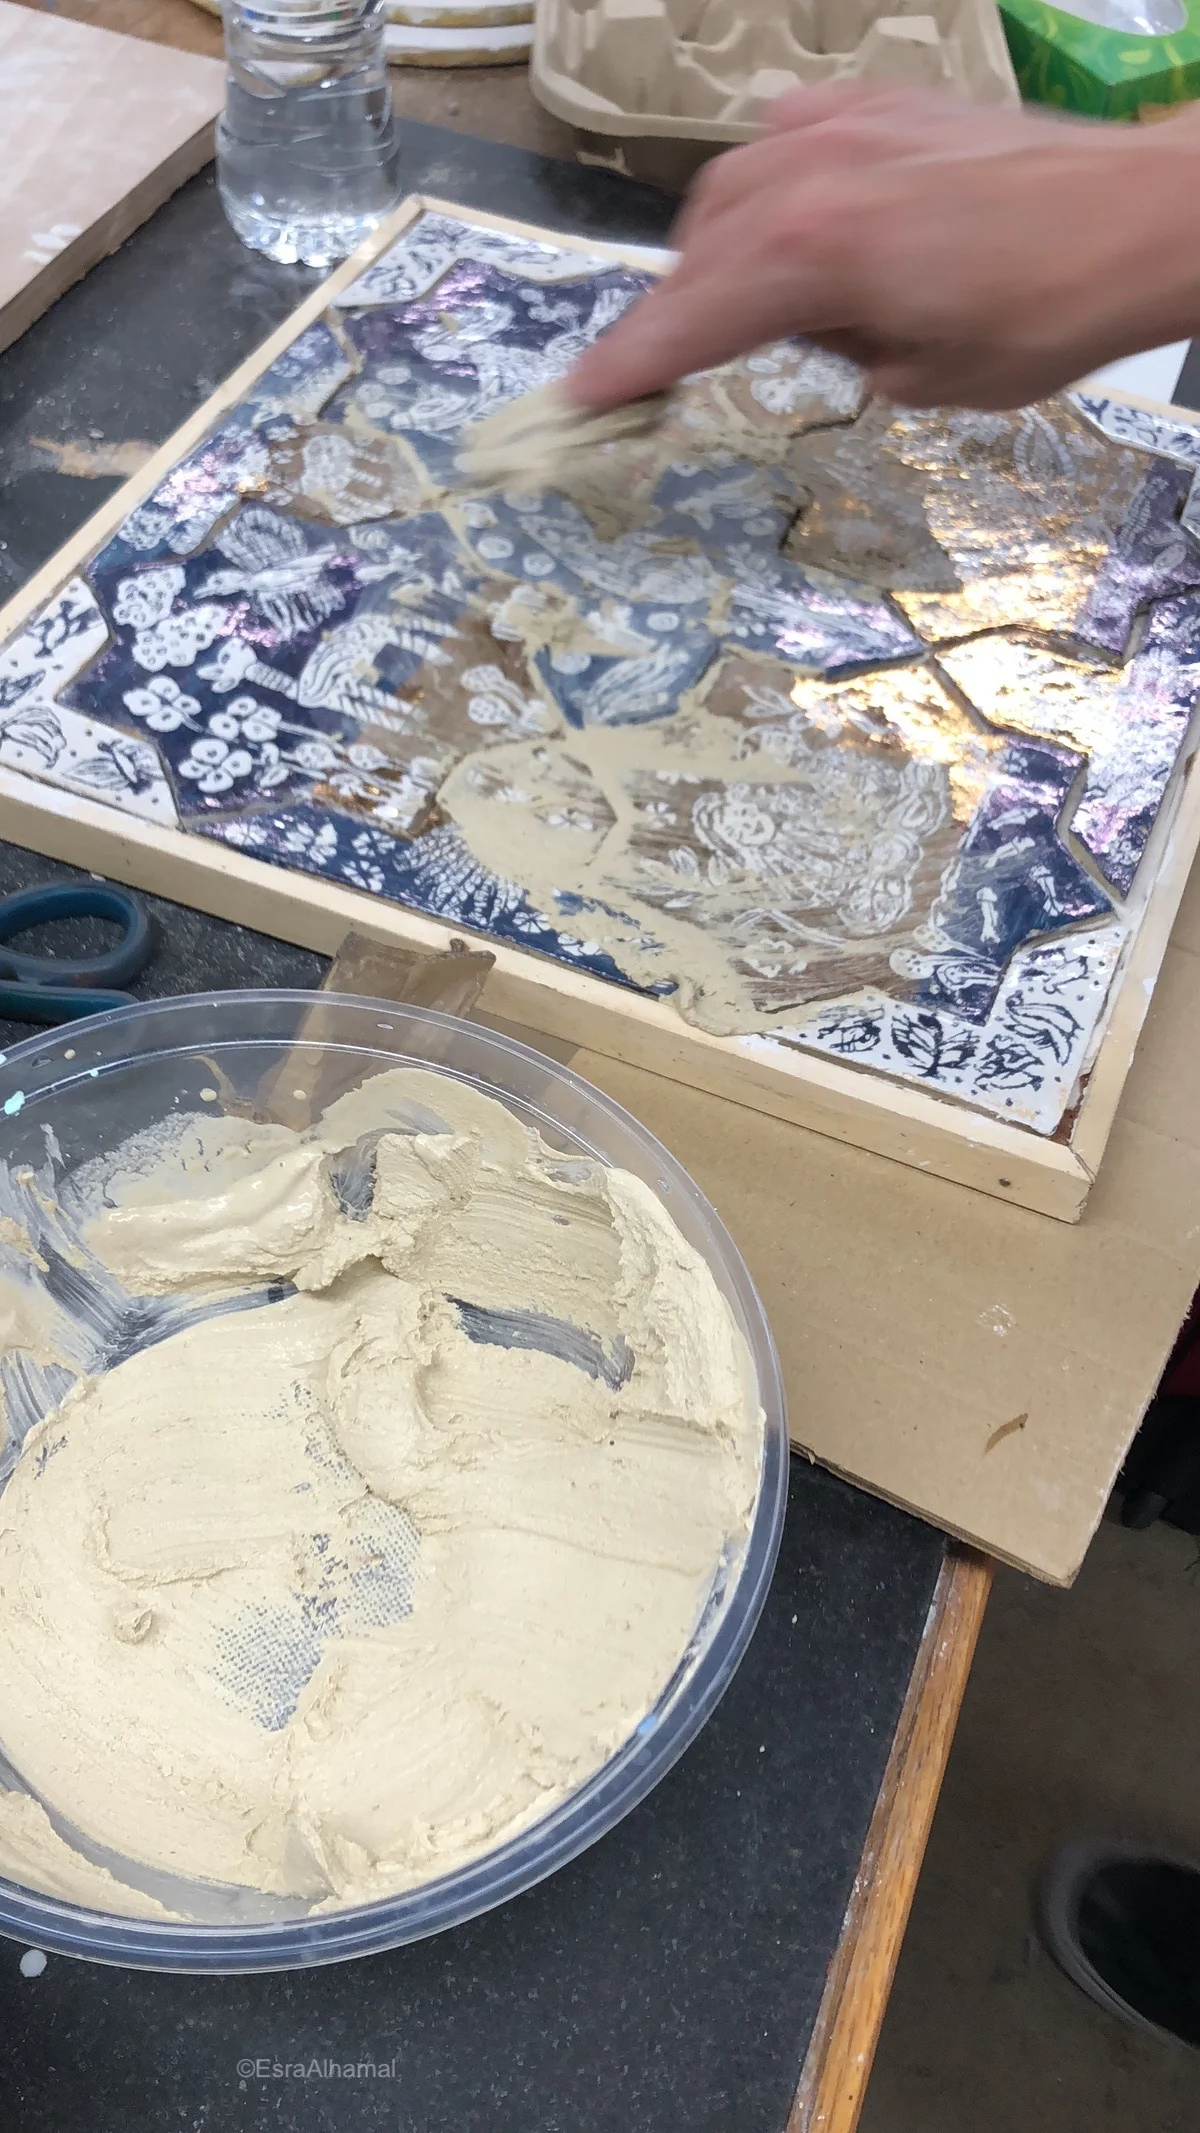
How do you make a panel of lustre tiles?
Once you have a collection of lustre tiles, you might want to display them as a panel.
For this you would need a wooden panel cut to the size of the tiles, a wooden frame, both of which you can make yourself or order from a carpenter.
You would also need a special wood adhesive, tile adhesive and grout. I walked to a B&Q and asked for all of these things. I had to have a salesman with me because I didn’t even know how these materials looked like.


Once you have everything, start with applying a thin layer of the wood adhesive on all parts of the wood and leave it to dry. The type I got dried in 10 minutes. Then place a layer of tile adhesive inside the wooden frame and on the back of the tiles. In this stage, you can correct the straightens of the tiles buy adding more adhesive to make them in line. Set a side for at least 24 hours.

The next day, take the ivory coloured grout powder and the necessary amount of water to it and apply it in between the tiles. It’s okay to touch the tile surface with the grout, but make sure it doesn’t dry on it. Give the tiles a little wipe with a sponge and water after you are done and keep dusting. It should take another day.
My experience with this is limited to the one time I did it in the class with Boris, but I hope you found it useful.
Recommended books on lustre
There are two recommended books that can give you greater details on the subject:
Persian Lustre Ware by Oliver Watson and Lustre Pottery by Alan Caiger-Smith (can be found in the two links below)
Both books are filled with really useful information about the craft and might help you understand the theory behind the practical craft as well.


Over to you: Have you tried painting ceramics with lustre before? I am curious to hear why you are interested in these types of tiles!


![[Pigments & Handmade Watercolour]
The first time I was told about making my own watercolours from pigments, I was confused and thought why would I ever need to do that with such an abundance of choices out there in the shops, but something clicke](https://images.squarespace-cdn.com/content/v1/5723e7f53c44d8676af44a5a/1593364075353-5E6JVA2WRDFXW55RLU86/image-asset.jpeg)
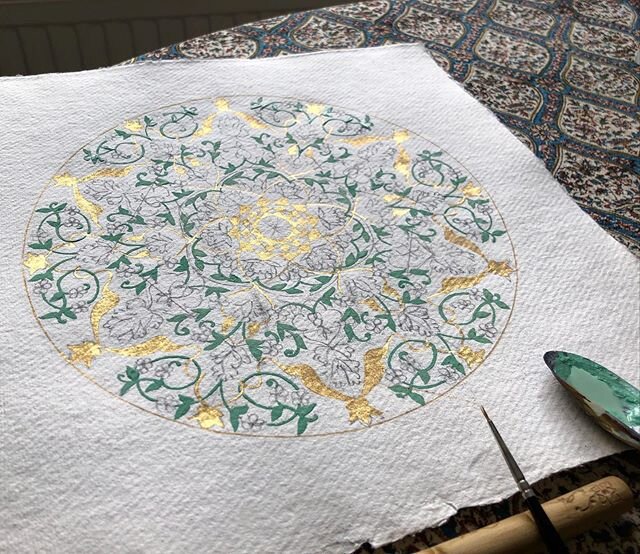
![[Copyrights & watermarks] ⤵️
.
.
22ct gold added✨ & this lovely brush stand is made from the garden rosewood by @fidget_one 💛🙏🏻
.
.
“You should put a watermark” someone told me, but it’s not the first time I get told &ldq](https://images.squarespace-cdn.com/content/v1/5723e7f53c44d8676af44a5a/1591790274366-15MOG8GA6UAJXTH7SWW9/image-asset.jpeg)
Lustre tiles are shiny and have a gold like layer on top, but there is a method to making and painting them that you might not read about in making ceramic tiles. This post will tell you how to do your own tile from start to finish!